1964 Studebaker Daytona Restoration
Rocker Panels
Tools required: - Ball-Peen Hammer
Metal Chisel
Vice Grips x 2
MIG Welder & Gloves /Helmet and/or
Pop Riveter and 3/16 x 1/4 in grip steel jacket rivets
Portable Angle Grinder
Portable Drill with 1/8 bit
Rocker Panel Undercoating - 1 Can
Parts Required
C2C Fabrication - Rocker Panels 1961-66 Studebaker 4 DR LH 956-040-1 & RH 956-040-2
Note: Car needs to be up on jack stands or on hoist to better enable you to install the Rocker Panels
Useful link - Sheet Metal Gauge to inches chart
Task: Remove Rocker Panels

Rocker Panels on the 1964 Daytona are secured using spot welds located in the weather stripping channels & in the rear. They are about
2-3 in apart and you first need to remove the carpet and sill plates to get at them. Once you have clear access then you can proceed to start
from the rear portion of the Rocker panel and start to chisel them off. You will see that they are joined by spot welds and you can work you way
to the front of the vehicle separating the rocker panel from the floorboard. This is a 1 inch strip of metal that they are secured to which goes from
front wheelwell to the rear wheelwell. To remove the rocker panels at the underneath side just bend it back and forth and it will pop right off.
You will need to grind down the spot welds at the front and straighten up the metal strips that were bend in the removal process. Inspect all floorboard
metal strips to ensure that they are in good shape and are square front to rear so you can properly secure your new rocker panels with no gaps
Task: Rocker Panel Prep
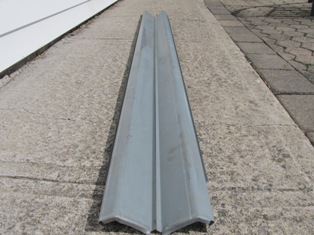
Before I installed the Rocker Panels I sprayed the inside of the rocker panels with Primer & Black Rust Paint
Task: Install Rocker Panels

Left side rocker panel installed ensuring proper gaps & door operation
Some restorers will use large steel pop rivets and I decided to use a combination of both methods. I personally choose to do both methods using 3/16 inch/1/4 inch
steel pop rivets to secure the rocker panels where the rubber door seal is located. Its very hard to weld in that location and if you use Steel pop rivets
every 2 inches its will be securely fastened - do not use aluminum pop rivets as they will corrode due to lack of similar metals being used.
Using Vise grips to secure the Rocker panels in the proper position you then can proceed to spot weld the other side of the rocker panels
every 2 inches which will ensure a strong installation. Ensure you have taken time to properly line up each Rocker panel to ensure proper
operation of the door, that the rocker panel is level with the floor and that it has a 3/16 inch gap at the front fender. Once both rocker panels
are properly secured you can spray with Primer/Rocker panel Paint

1964 Daytona Restoration