1963 Studebaker Champ Restoration
Cab Interior
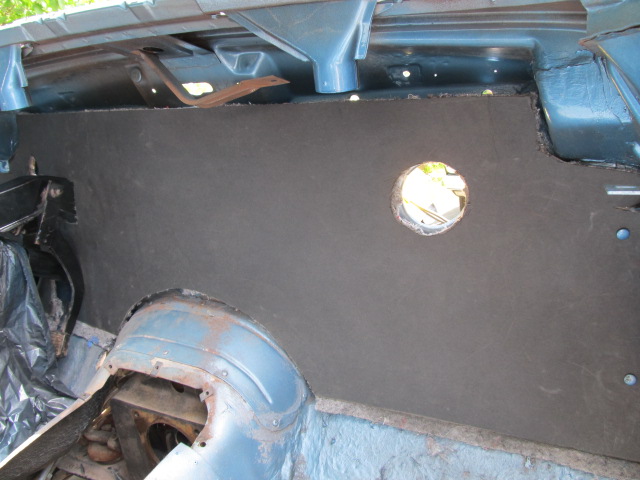
Task: Install Interior Firewall Insulation Pad
Need to install Firewall insulation pad on the inside of the cab next to the firewall to stop engine heat
from entering the cab and also help to fireproof it. Get a large piece of cardboard and cut out pattern before
you cut the Insulation to ensure you don't cut the pad improperly. To cut the large heater hose holes use the
proper Household Heater vent hose drill hole cutter to get a clean cut. To cut the other smaller holes and also
the ends use a aircraft cutting shears. Once fitted use the 7 clips that secure it from the inside to the firewall.
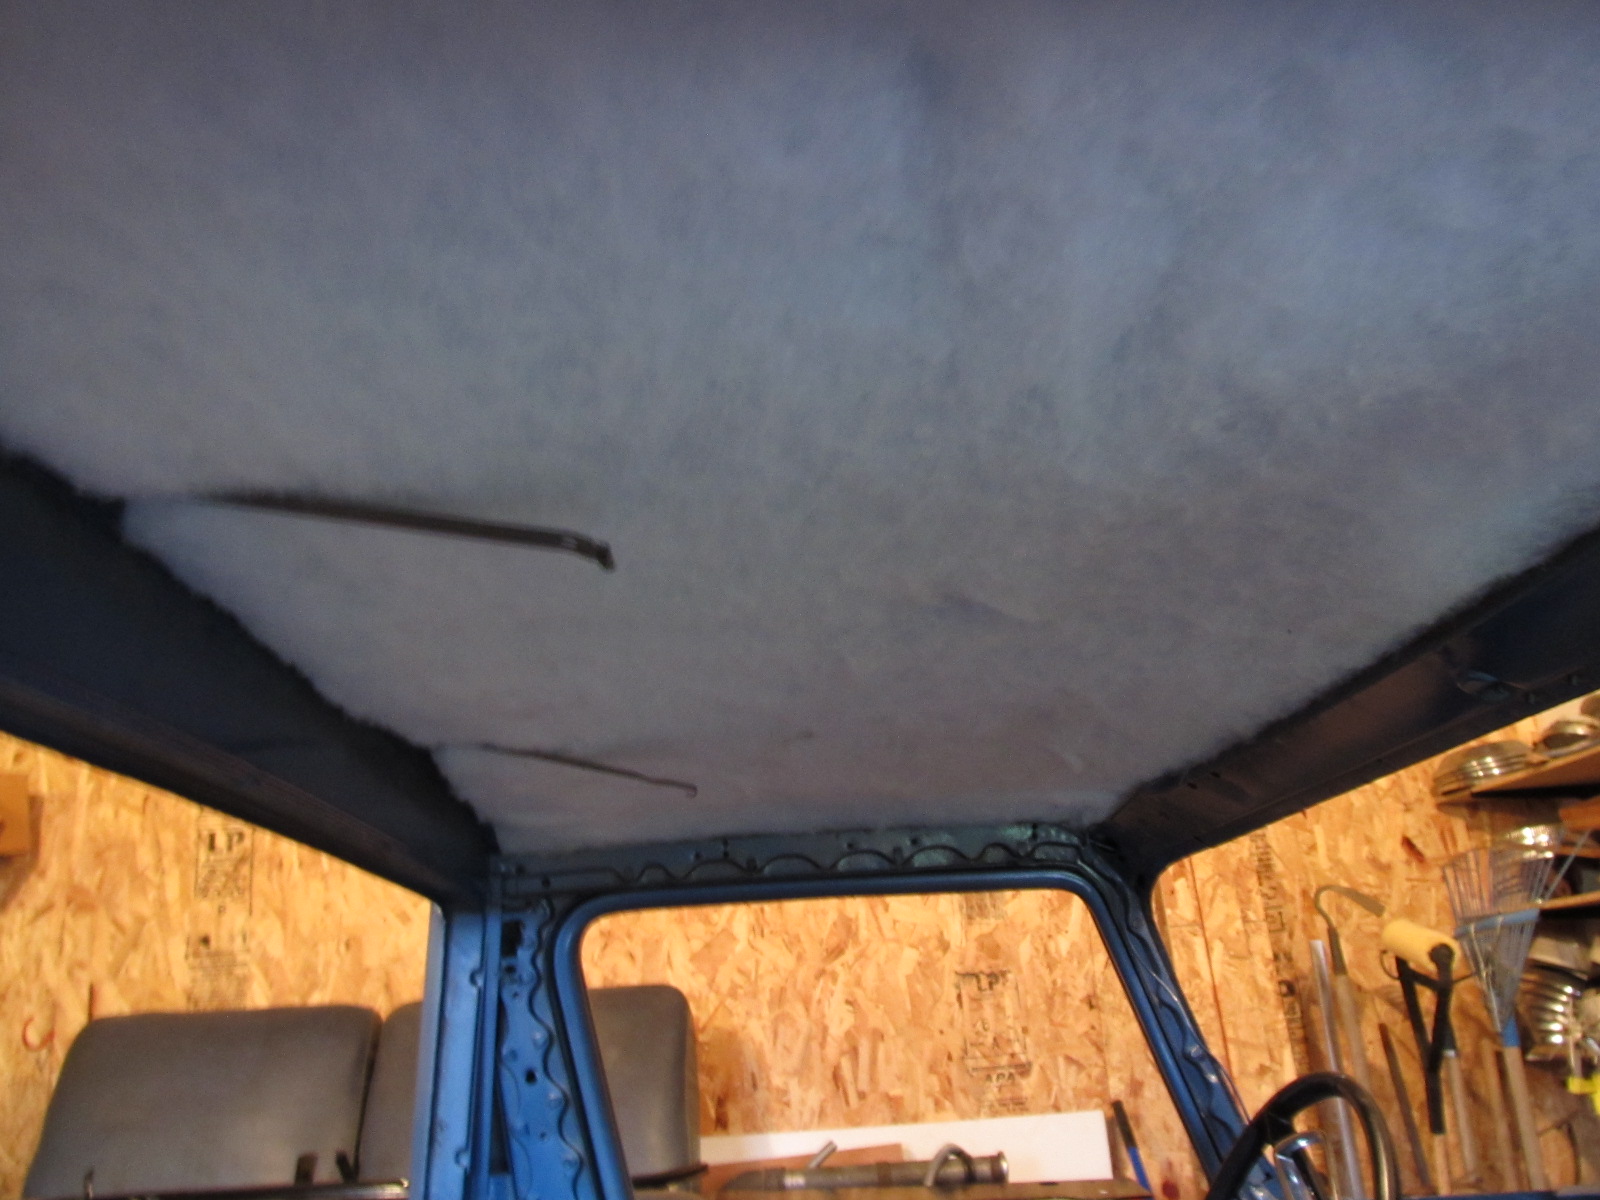
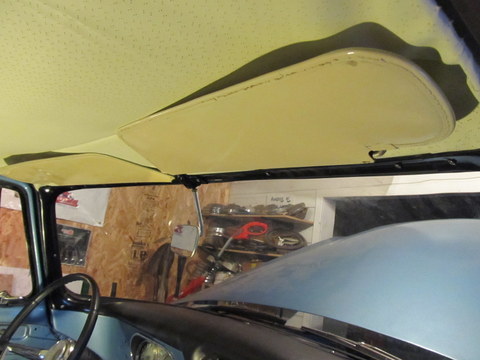
Task: Install Ceiling Insulation
Get a can of spray on - contact cement and attach a cut to size pad of ceiling insulation which
you can buy at any upholstery shop. While you at it get some bulk Headliner material 2 metres.
If you can't find one to sew the rod holder pockets then get a custom build one but expect to pay
I cut to size with abit extra which will trimmed upon final installation

Task: Install Headliner
Place Headliner rods in their holes and measure to sew in pockets. Ensure to sew abit closer so all of
the slack is taken up once the headliner is installed. The front part of the Headliner is glued with contact
cement & secured by stationary clips. Pull tight and cut neatly to fit under the windshield seal once
you get to that stage. Leave overnight to ensure it's dry and secure
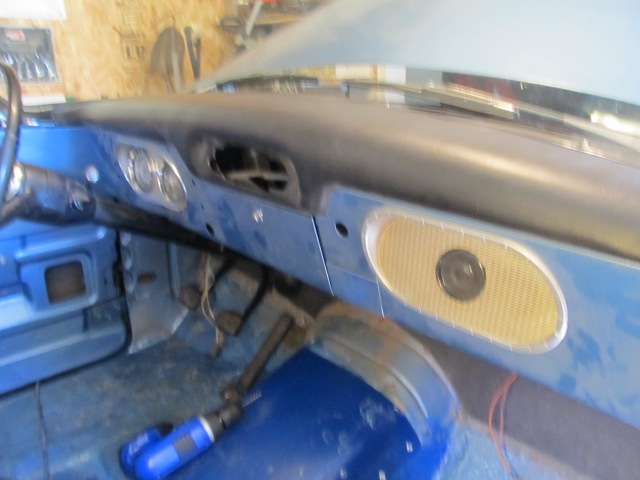

Dash installed with gauges End Dash Brackets secured
Task: Install Dash & Trim
If the dash has been removed best to have it complete as possible before reinstalling it. Have all of the gauges
and housings installed and also if you plan to have a new dash pad time to do it is when it out of the cab.
Before you install the dash ensure you have as much done behind the dash as possible as the space is limited and
hard to work behind install such items as the heater motor and hoses. If you have to install the wiring harness
this can be done after the dash has been installed. Step 1 is to ensure you have all of the speed nuts installed
in the proper spots to ensue they line up for when you screw in the dash. Position the dash over the steering column and
clip the front 4 clips while positioning the dash over the end brackets. It should snap into place and then secure the dash
at the end brackets underneath. Secure the centre bracket at this time. Then secure the front bottom dash trim to
the four front speed nuts through the trim and das. Position the top trim piece with the rear view mirror lining up the
screws with the holes using a long finishing nail first as its hard sometimes to find the hole and this makes it easier to locate
the hole which you can't see due to the headliner being installed. Now is a good time to install the windlace. Once the windlace
has been installed then attach the left & right trim pieces ensuring not to miss any screws. At this time you can also install the sunvisors.
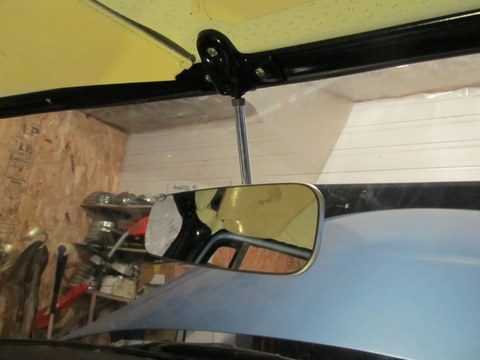
Rear view mirror and trim secured Sunvisors installed

Champ Restoration