
1964 Studebaker Daytona
Paint
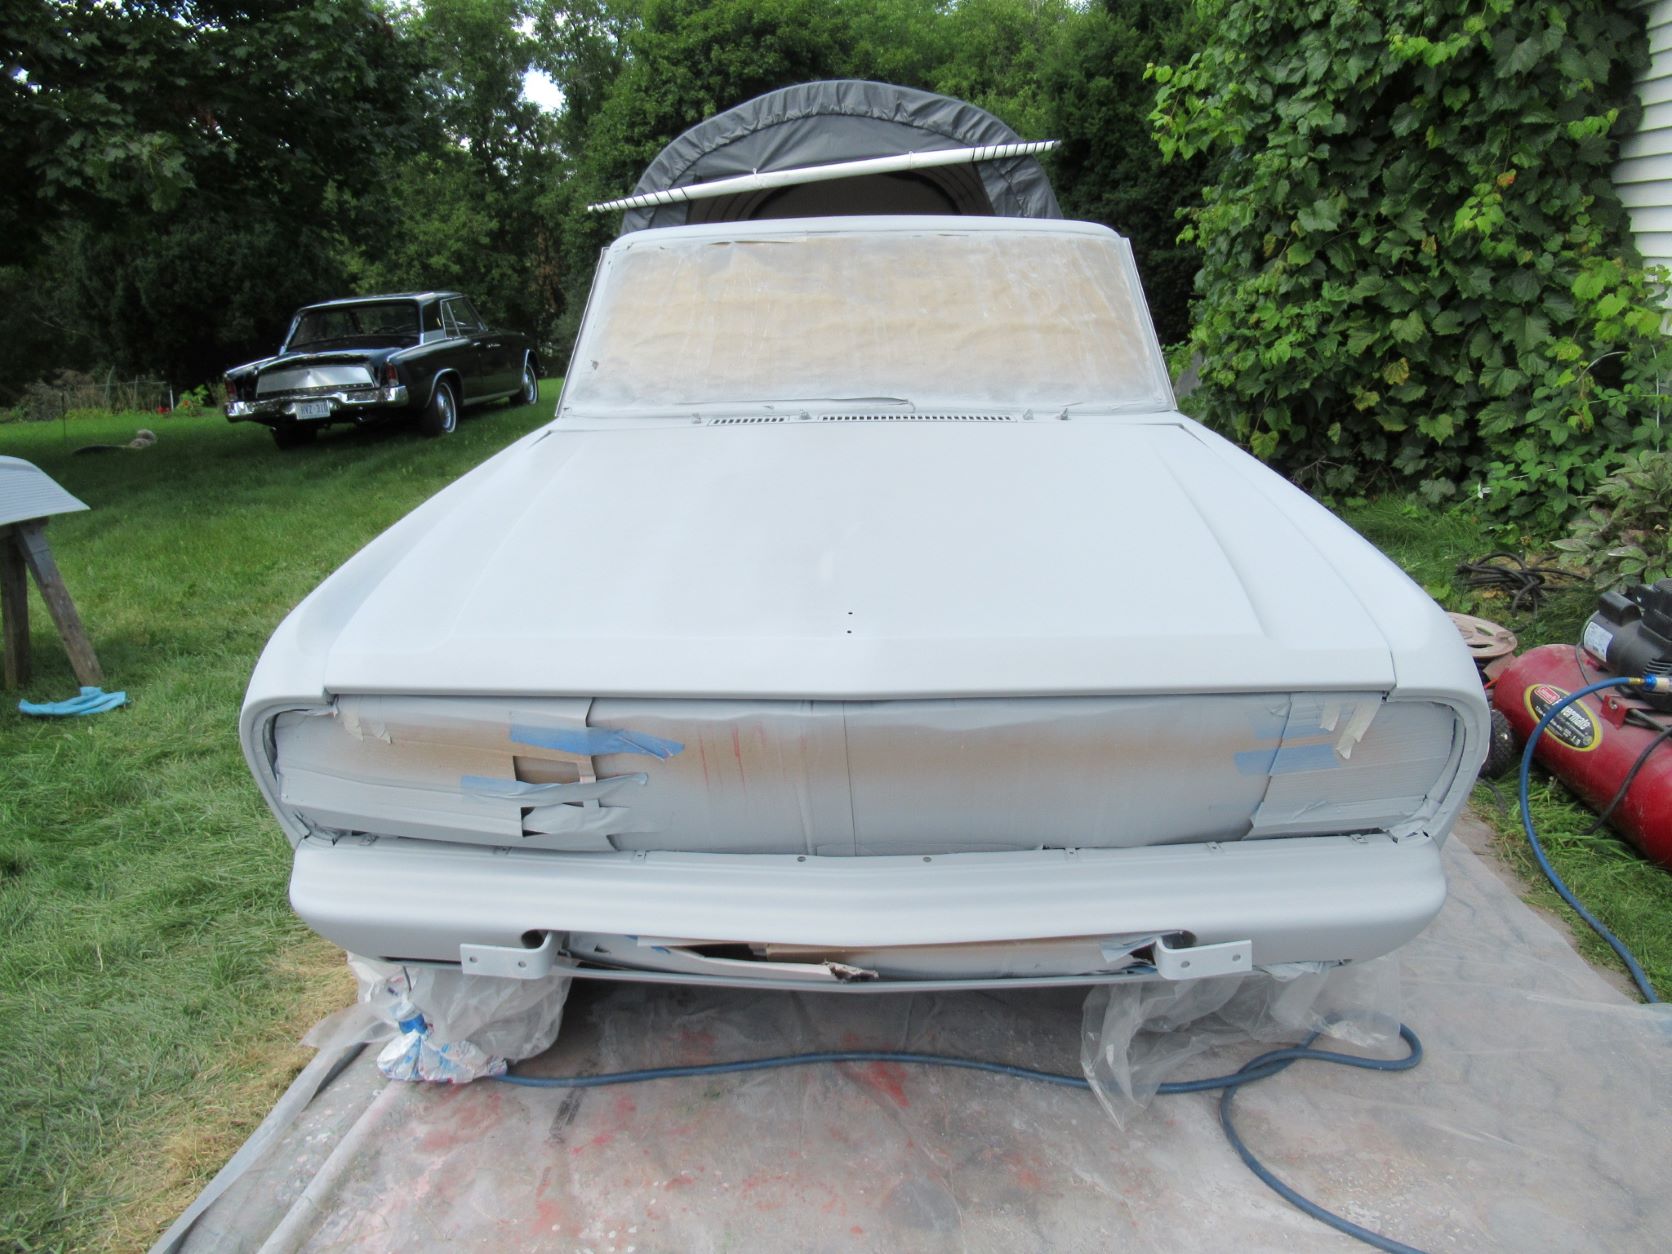
Daytona with three coats of Polyurethane
Required items needed for painting the Daytona
Sandpaper - Mainly 240 dry & then 400/600 wet sandpaper you can also have 1500-2500 grit
to remove bugs and other imperfections in the paint prior to using rubbing compound
Orbital sander if you have alot of sanding to do on the initial body prep
Primer Paint for 2 coats
Masterpro Gray Primer - 1 Gallon
Masterpro Activator - 1 quart
Medium Reducer as required
Items required needed for 3 coats of Polyurethane
Ford Dark Toreador Red - Spralac Polyurethane 1.50 Gallons
Valspar Spa150 Activator - 1.50 quarts
Valspar Medium Reducer - LBVM100
Items needed for Painting
Compressor with hose
HVLP Spray gun
Paint Face mask
assorted Paint brushes
Paint Thinner
Plastic Gloves
Variable speed Buffer with pad
3m Rubbing Compound
1500-2500 Grit sandpaper
Microfibre polishing clothes
Liquid Car polish
Polish buffer
Paint booth or outdoors under optimum conditions using plastic ground sheet 12 x 24 ft
Task - Prepare car for Bodywork
1. Remove all trim by prying very carefully under the trim pieces with a removal tool (stout putty knife) When removing the trim pieces
from the door first remove the door handles using a flat screwdriver first and then remove the trim pieces using the putty knife
2. Remove all badges (Daytona on front fenders & crossed flags on body pillars) very carefully to avoid breaking off pegs which is easy to do
3. Remove front & rear Bumpers by using a 11/16 inch wrench (6 bolts per bumper) you may need to use liquid wrench to help remove these bolts
which tend to be rusty. When removing the rear bumper disconnect the two wire connectors in trunk prior to removal
Task - Body Repairs Carry out all necessary Bodywork as per daytona_body.htm The more work done towards the bodywork the better the final paint job will be so don't cut corners.
Task: Paint Engine Compartment
In order to properly paint the Engine bay you sometimes have to remove the entire engine to get at all of the areas that need to be cleaned.
I didn't remove the engine for this task and removed as many of the parts I could and take photos if you are unfamiliar with their re-installation
Clean up all of the dirt & oil that are on the fender aprons and other areas of the engine compartment. I proceeded to paint the areas that need
touchup with a spray can of Dupli-color Ford JL Dark Toreador Red. Once dry you can start to install the many engine compartment parts.

Finished painted Engine bay - Not concours level but cleaner then most
Task - Paint interior Floor & Trunk

Once all of the Interior floor & Trunk repairs were completed, I proceeded to mix up a batch of paint 4 parts paint, 1 part Reducer and one part Activator.
I then painted the floor and trunk with a 2 inch paint brush but a roller will work just as well. I didn't want to use a gun as I would have to remove everything
or mask it all to ensure that paint didn't get on door panels or the dash etc. The results turned out pretty good for a brush finish and the interior floor will be covered
by carpet down the road and the trunk also be covered by a Houndstooth floor mat along with the spare tire.
Task - Masking complete Vehicle
You will have to mask all glass and chrome/stainless steel parts that were not removed. Use thick paper & green 2 inch masking tape over the glass to ensure that the paint
doesn't seep through Cut 4 sections of plastic to cover the wheels during the painting and since the car was to be used out in the open I used a 12 x 24 ground sheet.
Ensure all parts that you don't wish to get painted is properly masked or else you will have to do alot of work removing the paint after your done.
Task: Paint Car Exterior with Primer
Park the car on the groundsheet where no overspray gets on to items like your driveway. If you have alot of bugs in your area you may wish to paint
it when they are not active. I also used a 3 step ladder so as to reach all parts of the roof with the spray gun. Have a board with a lot piece of paper where you can setup
your gun prior to commencing painting. You should have a initial vertical spray pattern of 6 inches and set the gun to deliver a reasonable amount of paint
but not enough that may cause it to run. You will want to use a 50% overlap in your painting method and don't hold the gun too long in one place or
it may run on you causing you alot of work down the road. You will start to paint the roof first and proceed to work your way around the car.
You will need to stop and refill your Spray gun tank with the paint mixture around 3-4 times to do one coat but that depends on your tanks capacity.
I initially painted the entire car exterior with Gray 2K Primer and next day wet sanded with 400 Grit in prep for painting the second coat of 2K primer.
Mixing ratio is 4 parts Primer to 1 part Activator and use Medium Reducer if necessary to no more then 20-25% to get it to go on smoothly.
Ensure you sand the car body completely and that you have a smooth & clean surface to get the best results. After a second coat of 2K primer is applied
I let it sit for another day and I wet sanded again the next day with 400 Grit in prep for main coats of paint.
Task: Paint Car Exterior with Polyurethane
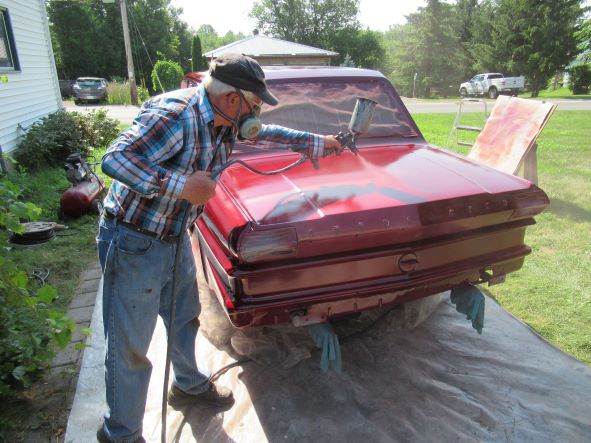
Some persons will want to go with a Base coat/clear coat paint job. To keep things simple I decided on single stage Polyurethane which is both
a base coat and clear coat combination and will be just as durable and shiny. I used 1.25 Gallons of Ford JL Dark Toreador Red Polyurethane Paint was
mixed to a 4 parts Base, 1 parts reducer and 1 part Hardener ratio and used my compressor with a HVLP Spray gun at 90 lbs pressure using an
in-line oil & water separator. Preparation is everything and makes the difference between a poor or good paint job. Ensure your compressor has an in-line
oil & water separator to avoid getting water on your paint job. The Daytona was given three coats of paint which was sanded between each coat.
Ensure also to do the rocker panels and the parts of the body next to the ground. Once it was painted with a coat of paint I let it sit for one day between coats
I used 400 wet sandpaper for the 1st Coat then 600 grit wet sandpaper for the 2nd & third coats.
Task: Removing Orange Peel & buffing the paint
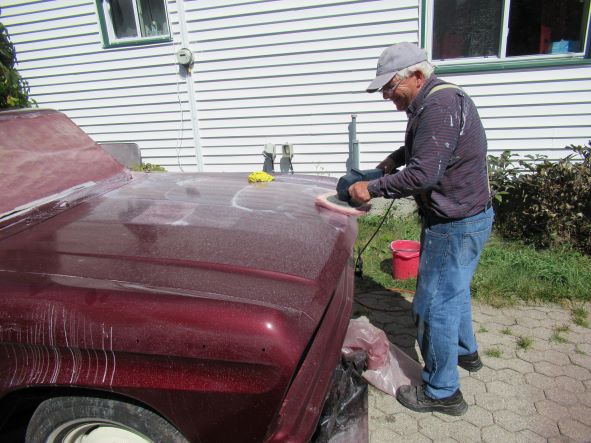
Cleaning up the paint job with 3M rubbing compound and Hi-Speed buffer
Orange peel is a common problem when you are still learning how to paint a car. Compressor air pressure, Paint gun adjustment, temperature, paint mixture
and your skill level will effect the overall paint job results. Take you time and ensure that your body is properly prepared first before you think about the final paint job.
After each coat of paint increase the grit of your sandpaper as indicated above and wet sand as necessary. After the three coats we did have some orange peel and
we increased the air pressure and repainted the trunk lid and sides of the car. We got a smoother surface and saved some time and effort in the sanding and buffing process
We then proceeded with sanding wet with 1500-2500 grit and some buffing with 3m rubbing compound. Start with 1500 grit and remove all orange peel and increase
the sandpaper grit to get a glass like finish. Use rubbing compound then afterwards car polish to get to a high shine. If still not clear then redo as each time
it is done it will get better and you will get that high gloss paint finish that you are looking for.
Note : Painting this car was the most challenging part of this restoration and if not familiar with painting then get it done by someone who does.
A good paint job can cost anywhere from $3000 to $5000 so if you do it yourself it can save alot of money but its not for the faint of heart or someone that is all thumbs.
Task -

1964 Daytona Restoration